

A stainless steel nameplate is engineered from a drawing, material specification, marking method and attachment plan—not produced from a logo file alone. By the end, you will know how to specify the plate, approve the overlay artwork, compare marking methods and evaluate the production steps before ordering.
Key takeaways
- Fix grade, thickness, finish, grain direction and hole pattern on the drawing.
- Match overlay adhesive to the metal finish, temperature and cleaning chemicals.
- Use registration marks and a controlled proof to prevent artwork and cut-line errors.
- Check legibility, dimensions, adhesion and surface defects before releasing plates.
How the stainless steel plate is specified before production
Before production, fix the stainless grade, sheet thickness, finish, grain direction, finished size, corner radius, hole pattern and viewing distance on the drawing. A logo file alone cannot control fit, legibility or appearance.
Specify these physical details:
- Grade and thickness, because corrosion resistance, rigidity, weight and cost change with the sheet.
- Finished length and width, corner radius, hole or slot coordinates, hole diameter, and countersinks where required.
- Grain direction, because a dimensionally correct plate can still look wrong when its brushed lines run across the intended direction.
- Viewing distance and text height, because lettering readable at 300 mm may disappear at 2 m.
| Grade | Service | Decision |
|---|---|---|
| 304 | General equipment, indoor use and ordinary moisture | Cost-effective default |
| 316 | Chlorides, coastal air, bleach, acidic cleaners or aggressive chemicals | Pay more when corrosion exposure justifies it |
Choose the finish for both appearance and handling. Brushed stainless reduces glare and disguises light fingerprints and handling marks; satin gives a softer, uniform sheen with less visual drama. Mirror-polished surfaces create strong visual impact but expose fingerprints and scratches.
Bead-blasted surfaces scatter light, producing a matte appearance that controls glare, though rough texture can retain dirt and show rubbing marks.
Specify stainless steel nameplates in Pune against the actual installation environment, not the word “stainless” alone. Record humidity, outdoor exposure, UV, oil, coolant, solvents, cleaning chemicals and abrasion risk; those conditions determine whether 304, 316, the thickness, finish and fixing method will survive.
The custom metal nameplate process from drawing to finished plate
After specifications arrive, the custom metal nameplate process begins with an engineering drawing and artwork review. Confirm finished size, thickness, corner radius, grain direction, hole locations, slots, windows, cutouts, domed corners, countersinks and adhesive zones before tooling.
These details control both fabrication and artwork registration; a misplaced hole can force text or symbols into the fixing clearance.
1. Review the drawing against the artwork, checking that legends, logos, borders and viewing orientation match the physical plate. Define the clearance around screws, rivets, edges and adhesive areas before issuing a proof.
2. Obtain proof approval before cutting material. The approved proof becomes the reference for dimensions, feature alignment, colours and later printing or overlay application.
3. Cut or blank the stainless sheet to size, then drill mounting holes and make slots or internal openings. Form countersinks, domed corners or other features while the part remains accurately supported.
4. Deburr every hole and cutout, then finish the edges. Remove sharp burrs and raised metal that could cut an installer, damage an overlay or prevent full adhesive contact.
5. Clean the surface with a compatible solvent and lint-free material, allowing it to evaporate before handling. Inspect dimensions, hole positions, cutout sizes, edge condition and surface cleanliness before printing or bonding.
A plate can pass dimensional inspection and still be rejected if its brushed grain runs vertically instead of horizontally, or if a window, logo or hole does not align with the approved artwork. Appearance and functional clearance are part of acceptance, not cosmetic afterthoughts.
How graphic overlays create readable interfaces on metal plates
A graphic overlay is a printed polyester or polycarbonate film, a laminated protective construction, or a printed face layer bonded to a stainless steel plate or supporting panel. Graphic overlays create operator instructions, symbols, warning zones, scales, legends, branding and membrane-switch windows without relying on engraved text alone.
For transparent film, reverse printing places the artwork on the film’s underside, keeping ink away from fingers, abrasion and cleaning chemicals. The ink stack can include colour layers, metallic ink and a white or opaque backing; changing its order changes transparency, contrast and whether a metallic colour appears bright, muted or solid.
The overlay is then laminated or bonded to the prepared plate, with cutouts aligned to holes, switches and viewing areas.
| Method | Strength | Prefer it when |
|---|---|---|
| Screen printing | Repeatable solid colour and opaque graphics | You need consistent colour across a production batch |
| Chemical etching | Permanent recessed or darkened identification | Marking must remain after coatings or printed layers wear |
| Laser marking | Permanent, precise marking | Variable serials or fine data matter; test its effect on brushed grain |
| Digital printing | Variable graphics without screens | Short runs, changing data or photographic detail are required |
| Photo anodizing | Durable image in an anodized surface | The part is anodized aluminium rather than stainless steel |
| Direct engraving | Deep, tactile permanent text | You need physical depth and extreme resistance to surface wear |
Artwork, registration and adhesive choices that prevent production failures
Approve these details on one controlled drawing and artwork proof:
- Finished size, corner radius, grain direction, adhesive area, and mounting-hole coordinates
- Cutouts, windows, countersinks, and clearance around rivets, screws, studs, standoffs, and plate edges
- Text and symbol files, colours, minimum font size, and viewing distance
- Operating temperature, humidity, UV exposure, abrasion, oil, coolant, solvents, and outdoor weather
Registration must be checked layer by layer: the stainless blank sets the outer dimensions and fixing holes; the printed film aligns its text and symbols to those holes and cutouts; the protective surface covers the graphic without shifting it; the adhesive remains inside the approved bond area.
Text placed beside a hole can become unreadable after a rivet head, screw, or countersink is fitted. Keep a defined clearance from every fixing and edge.
Treat the overlay film, ink, protective layer, and adhesive as one construction. Changing the film alone can alter UV, solvent, abrasion, and outdoor performance. Clean dry stainless with a compatible solvent and lint-free material, allow evaporation, avoid touching the bond area, apply firm pressure, and observe the adhesive’s temperature and dwell time.
Choose rivets, screws, studs, or standoffs instead of adhesive-only mounting when the plate must be removable, faces sustained heat, rough or contaminated surfaces, or impact.
How Pune production is checked, priced and released for installation
1. Approve a controlled proof before any batch starts. It should show the artwork revision, finished dimensions, hole positions, overlay registration, colours, contrast, viewing distance and material construction. For equipment label production in Pune, sign the proof only after reviewing a physical sample or first-off part.
2. During batch production, inspect cut dimensions, hole positions, edge quality and adhesive placement before applying the overlay. Check registration between print, windows and mounting holes, then verify colour, contrast, adhesion and legibility at the stated viewing distance. A clean-looking batch can still fail if text shifts toward a screw or an edge remains sharp.
3. Ask for a final inspection record covering the approved artwork revision, stainless grade and thickness, overlay film, adhesive type, print method and inspection criteria. Pack each plate with a protective film, interleaving or other protection that prevents scratches, bent corners, contamination and adhesive exposure during delivery.
4. For demanding service, agree qualification tests before production: abrasion, solvent or chemical resistance, peel or adhesion testing, temperature cycling and UV exposure. Use ISO 9227 neutral salt-spray comparison for corrosion screening, but do not treat salt spray as a prediction of every field environment.
5. Require a quotation that separates tooling, screens, artwork cleanup, colour matching, die cutting, drilling, adhesive application, inspection and packaging from piece price. Shreeniwas Signs Pvt Ltd can be considered when comparing Pune suppliers, provided you compare documented construction and process rather than piece price alone.
That is how stainless steel nameplates are made with graphic overlays in Pune without an unexplained substitution.
Related product
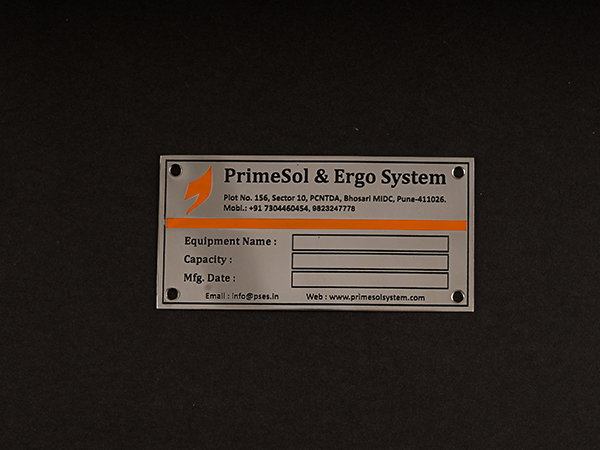 | Metal Labels In the most testing conditions, particularly overwhelming modern situations, where heat, moisture and erosion are available, Stainless Steel... View product → |
Frequently asked questions
What must be specified before making a stainless steel nameplate?
Specify the stainless steel grade, sheet thickness, surface finish, grain direction, finished dimensions, corner radius, hole pattern and viewing distance on the drawing.
What is the custom metal nameplate process from drawing to finished plate?
The process moves from an approved drawing and artwork proof to metal cutting, forming or drilling, surface finishing, printing or marking, overlay application, inspection and release.
How do graphic overlays create readable interfaces on metal plates?
Graphic overlays add printed symbols, text, colour zones and operating instructions over the metal plate, while transparent or selective windows preserve access to displays, buttons and indicators.
Which artwork and adhesive choices prevent production failures?
Use controlled artwork with defined cut lines, registration, fonts, colours and viewing scale. Select adhesive for the substrate finish, temperature range, cleaning chemicals and expected service life.
What is checked before equipment labels are released for installation in Pune?
Check dimensions, hole locations, text and symbol legibility, colour and registration, surface defects, overlay adhesion, quantity and packing against the approved drawing.